Search This Blog

2012-12-31

Escape 3D: The Library Part 2 Walkthrough

Escape 3D: The Library Part 2 Walkthrough

Here is the walkthrough and solution on how to solve 
Part 2 of the Library 3D Escape.


I got to the top floor...
But the exit was locked...
There has to be some way out.
Maybe a secret room...


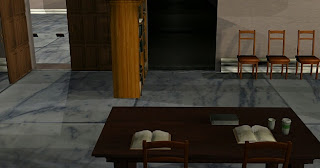
Where you start, pick up the wheel from the floor.
Read the book on the table - it contains a hint of how to open the bookcase:


Pick up board library card #3192 from the table.

Go Right.


Add the wheel to the ladder.
Move the ladder left.
Take the dark book close to the top of the ladder.

Go downstairs and to the safe you used in Part1.
Open the safe with the library card code: 3192.
Take the gem.

Put the gem in the dark book.

Go to the start room.
Use the dark book on the bookcase
It reveals a secret entrance


Go in.

Go forward and at the "secret ammo room", pick up the silver key.


Go back out and downstairs and use the key to open the locked door and exit.


... What secrets could the librarians be hiding?

Well done on solving part 2 of the Library 3D escape!


2012-12-30

Escape 3D: The Library Part 1 Walkthrough

Here is the Walkthrough and Solution for Escape 3D: Library. Part 1 .
  An escape game from bored.com.


Part1:  Find a way to move the bookcase and get our of here,,,


You start in front of the bookcase that you tipped over.  Behind it is a staircase.


Pick up the red book lying on the bookcase.

If you read the red book, then you will find a riddle:
I'm one letter, but also three.
I may be green, blue, or brown
when there's two of me.

(The answer to the riddle is I or EYE)

Go left.


Take the paper from the dustbin.
Take the AA batteries next to it.

Go left.


Look at the book cases and find some hidden items.
Take the red vacuum cleaner behind shelf 1.
Take the steps in front of shelf 4.

Go left.


Take the drill from the table.
Load the batteries into the power drill.
Take the piece of paper lying on the ground.
Combine the left and right paper
Look at the picture.  Remember the layout...


Go right.

Find the book on the bookcase that matches the picture.  I found mine on bookcase 3 at C.
Open this new book to find a metal hook.

Go to the room with the Bored.com logo on the wall.  Use the gem on it's eye.
Take the safe.
Use the steps in front of the shelf.
Get the rope.

Go to the bookcase & potplant room.
Use the vacuum cleaner on the floor.
Use the safe on the vacuum cleaner.

Go to the start room.
Use the drill on the fallen-over bookshelf.
Attach the hook to the pillar.
Attach the rope to the bookcase


Attach the rope-end to the vacuum cleaner.


Tap the vacuum cleaner / safe.


Go to the start room.  Now you can exit!


2012-12-29

Escape 3D: The Bathroom Walkthrough

Escape 3D: The Bathroom is a very fun room-escape game. 


  Not too difficult and my only complaint would be that some of the scenes are a bit dark that makes spotting the items very difficult.


Here is the full walkthough and solution to solve 
Escape 3D: The Bathroom

You start facing a bathroom sink.  Lets get you out of here in no time!


Move the carpet and pick up the key.
Take the box from next to the sink.
Use the key on the top drawer.
Open the top drawer and take the magazine
Open the middle drawer and take the stick handle
Go right.


Move the shower curtain
Zoom in on the shower head
Take the red wire
Zoom in on the bath
Take the duck
Go right


Take the paper from the bin next to the toilet
Take the black rubber item from behind the toilet
Remove the plug from the basin next to the toilet
Zoom in on the toilet and use the duck to block the outlet.

Flush the toilet
Take the yellow paper from the toilet

Use the stick with the black rubber to make a hammer
Use the hammer on the box in your inventory to open it to reveal bullets.
Insert the bullets into the magazine

Go to the start location.
Use the plug in the sink
Open the tap
Use the dirty paper on the soap next to the sink to wash it clean
Combine the 2 pieces of paper to reveal code 542915
Go to the Bored Painting and remove it to reveal a safe
Use the password paper on the safe


Open the safe and take the gun
Load the magazine into the gun
Go to the bathroom door
Use the gun to shoot the door
Open the door!


2012-12-28

100 Dooors, dooors 51 to 60

Let's continue the Walkthrough with solutions for 100 Dooors.  Here then the answers for doors 51 to 60.

100 Dooors, DOOR 51:

Remove the barrier chain between the cones.
Hook the chain to the ring on the ceiling top left.
Pull the chain 
Open the door.
You gave completed stage 51!


100 Dooors, DOOR 52:


Shine the Blue Saber above the door.  Look at the pattern, then build this same pattern using the 3 doors on each side of the main dooor.
To solve: open the top 2 doors on the left and bottom 2 doors on the right.
Tap the main door and exit.
Level 52 done.


100 Dooors, DOOR 53:


Level 53 have 2 eyes next to the door and an arrow going in circles above it.
To solve:
Step1: Shake the tablet so that the black pupils appear in the eyes.  If you do not get it right, shake in different directions:  up/down; left-right, upside-down, etc. Just hold on tight so that you do not drop or bump the tablet!!
Step2: Once they eyes have opened, rotate the tablet so that they go in the direction of the arrow
Step4: Repeat step 3 until all the green lights above the door as lighten up.
Step5: Tap the door and exit!

Stage 53 in the bag!

100 Dooors, DOOR 54:


Move the 2 plants away.
Take the hammer that was hidden behind the right-side plant.
Use the hammer to smash the barrel.
Move the round piece of wood to reveal a key.
Take the key and unlock the door.
Exit level 54.

100 Dooors, DOOR 55:


Use the cyber light and shine to the left and right above the door to reveal 2 patterns.
The 2 patterns consists of < and > markings either pointing up or down.
Repeat this pattern with the switches below it.
Left: up, down, up
Right: up, up, down.

100 Dooors, DOOR 56:


Level 56 of 100 Dooors is a smash-the-mole level.
You need to use the hammer and hit the man 10x to open the door.
If you miss-hit, then you will loose a green light.


100 Dooors, DOOR 57:


Light the grass with the fire stick.
Pick up the gun that was hidden in the grass.
Use the gun and shoot the clip at the top of the plank.
If you hit, you can tap the plank to fall down to create a bridge.
Exit the door.


100 Dooors, DOOR 58:


Level 58 was quite difficult to solve!

The hint for stage 58 is the number 7 in a star.
Look at the 7-star "Big Dipper" that is the 7 brightest stars from the constellation Ursa Major - to see the pattern and then re-create to open the door.

Here is the answer for stage 58:


100 Dooors, DOOR 59:


Use the gun and shoot the rope so that the target falls down.
Now rotate the tablet 18 times to light up all the green lights.
Tap the door or use the hammer on the door to exit.


100 Dooors, DOOR 60:


Shoot the balloons.
Hit the 6 nails so that the equation above the door is correct:
Nail1: do not hit
Nail2: hit 1
Nail3: hit 2
Nail4: hit 1
Nail5: hit 1
Nail6: do not hit

If you make a mistake, hit all the nails 2x then hit the door and they will reset.

Now, shoot the hinges off the door.
Tap the door or use the hammer on the door to exit.


CONGRATULATIONS.

2012-12-19

100 Missions 2: Mission 12 The Helipad

100 Missions 2: Tower Heist --> Mission 12: The Heliport
Walkthrough, solutions, answers, guide, tips & tricks
to solve mission 12.
 
 
Agent, you have exceeded all of our expectations!


You start in a room  with a pump station in front of you and stairs leading to a platform.


Look at the pump station and pick up the orange dirty and round stone.
Go back, then up the stairs.  Pick up the screw.
 
Climb back down and go left.


Zoom in on the fire fighting equipment.  Use the orange stone to break the glass.
Take the axe. 
 
Go back, then look at the door.
Use the axe to open the door.
 
Take another screw from the shelve.
Take the rope from the ladies.
 
Go out and use both screws on the machine next to the fire fighting equipment.
 
Go all the way to your right.
Take the hook.
Combine the hook and the rope.
Use the rope to climb up to the helicopter.
 
Take the rope on top of the box.
Use the rope by zooming in on the guard and tie him down.


Search the guard and take his keys.
 
Use the keys to open the helicopter door.
Take the parachute from the chopper.
Take the small roll of electical tape.
 
Use the elctrical tape on the guard's mouth.
 
Go to the pump station.  Zoom in above the pump.
Use the parrechute.
Jump off.


Congratulations, agent!


2012-12-13

100 DOOORS Walkthrough: Dooors 41 to 50

100 Dooors Walkthrough: Levels 41 to 50

Solutions, answers, tips, tricks and all the help that you will need to open the doors!

Dooor 41:


Tilt the tablet upside-down and shake a bit.  Will turn all the red indicators green.
Open the door and solve dooor 41.

Dooor 42:


Select the rain-drop (bottom) picture on the left.  Select the fire picture (2nd from top) on the right.  I would have thought the other way round, according to the blue/red hint.  Anyway this worked and you can open the door.


Dooor 43:


Lift the orange bucket.  Take the remote.  Use the remove on the tv.
Look at the patterns the 2 yellow dots make.
Select the correct number from the 2 number selectors.
The left yellow dot makes a "2".  The right yellow dot makes a "7".
Select 2 and 7 then open the door!


Dooor 44:


Two Camels...
Take the brush bottom left.
Use the brush all over the wall to clear the paint and reveal foot steps and arrows.
Select the object on the left and right that matches the foot-prints.
Select the MAN on the left and the Bird on the right.
Open the door.


Dooor 45:


Use the light saber to reveal an arrow to the left of the door, pointing to the door, or to the number "45".
Press the white button and release when the timer is on 45.  Keep on trying until you get it right.
Door will open.


Dooor 46:


Look at the pattern on the door.
Make this same pattern on the sides:
left: \ / \ / 
right: / \ / \

Tap the door and exit.

Dooor 47:


This one was tricky, but turned out very easy.
Slide the fence out of the way.
Then be patient.
The eays will fall asleep and then the door will *yawn*.
When it is fully yawning (or open!) then tap the open door and sneak out.


Dooor 48:


Scoop water from the swimming pool into the bucket.
Hang the bucket on the hook.
Pick up the wight and hang it.
Tilt your phone so that the door can fall down towards you over the pool.
The door will form a walk-way.  Tap the opening and exit!


Dooor 49:


Use the fire stick and burn the brown ties between the 2 fences.
Slide the 2 fences out of the way.
Adjust the 8 circles so that they resemble the 4 faces above the door.
Hint: Look at the eyes and make the red triangles point in the same direction.
If correct, you can tap door 49 and exit this level.

Dooor 50:


Half-way!

Use the blue saber light and look at the hint above the dooor.
You need to turn all the dots green, except for the bottom row on each side.
No so easy, but you should manage!
Hint: Work your way from the top down.  Easy enough to make the bottom row white.